I recommend going through the Real Getting Started Guides section below, but if you want my version, you can check out my version below.
Real Getting Started Guides
If you want to read, there’s good info in this reddit thread.
Honestly, just watch the Teaching Tech video here. It is good for beginners and is much better at explaining the basics than I ever could. The video is about the Ender 3, which is good because my printer (Ender 3 V2) is an upgrade to it and is mostly similar. He goes into depth on the parts and details on how to build the printer in the first 10ish minutes of the video (if you want, you can skip it, but it does tell you a lot about the parts in it).
After the the ten minute mark, he goes into depth about 3D Printing, and talks about the software. He uses Ultimaker Cura, but I use Prusaslicer. I don’t 100% know how Cura works, but it should at least run okay?
He also talks about leveling, which is VERY IMPORTANT for 3D Printing. On the plus side, my printer has a a lot of mods to make this easy. Just follow the levelling guide below.
Some key differences between my Ender 3 V2 and the Ender 3 he talks about
- Power Supply is different and is at the bottom
- The screen on the V2 is better
- I have “custom firmware” installed on the printer. More details on my firmware here. You really do not need to get into this.
- My printer is now a “direct drive”
- The Z axis motor is on the top.
Wiki Page getting started guide: https://old.reddit.com/r/3Dprinting/wiki/gettingstarted
The software I use: https://www.prusa3d.com/prusaslicer/
Remy’s Getting Started Guide
So this is what everyone thinks the 3D printer process looks like (and some printers like Bambu get close):
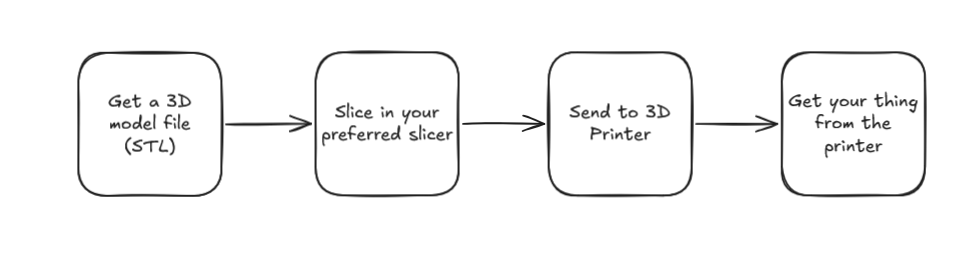 However, the process usually looks more like the below, assuming things go smoothly.
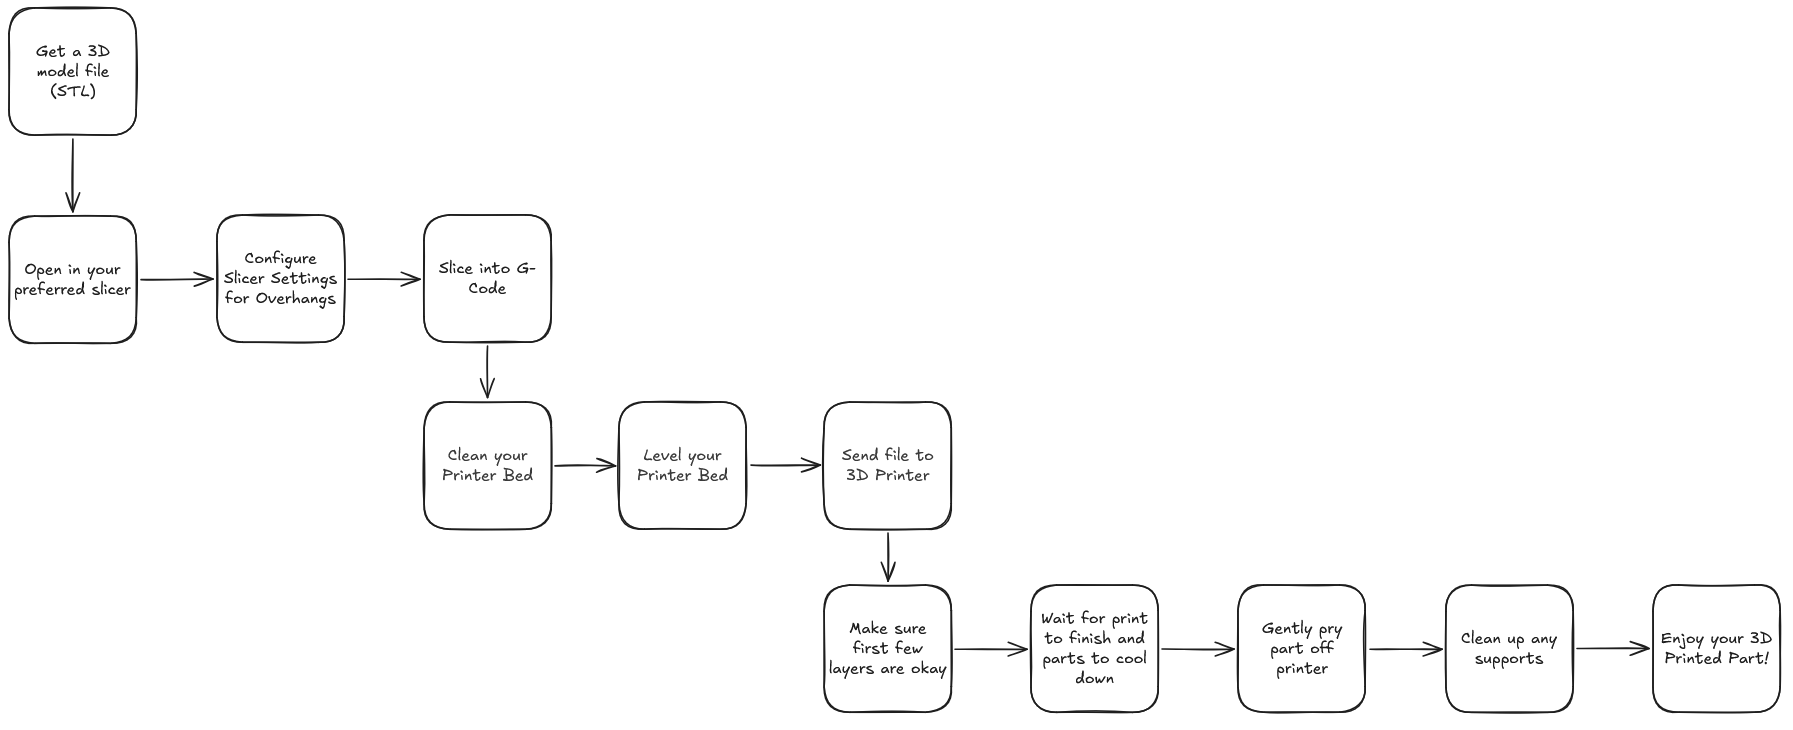
If things go wrong, it can get a bit more complex, usually with fiddling with either printer settings or slicer settings and trying to figure out what went wrong.
To be fair, some of what happens in my more complex flowchart can happen automatically, such as levelling the bed. And some is obvious, like cleaning the bed of previous prints.
My general advice, is to:
- Make sure you level the bed properly
- Tune the printer and your settings properly
- Make sure your temperature settings and fan settings are correct for the type of filament you are using
- Don’t be afraid to make mistakes
- Last but not least, have fun!
General Leveling instructions:
- Heat up bed to 70C
- Use the Tramming Wizard to make sure bed is level (it will tell you which corners to raise/lower)
- Run the auto bed level tool on the printer.
- Save the mesh
- After all of this, you’ll want to make sure the Z Offset is set up properly. You can follow Teaching Tech’s process with the paper, but I find using a feeler gauge helps me more. Basically you make sure everthing is hot, then make sure that it’s just low enough to scratch the paper/feeler gauge (at 0.1 or 0.15 mm)
- Though his points about squish matter as well. You might want to follow the first layer squish guide from Ellis’ Print Tuning Guide.
Tuning
If you want to make your 3D Printer the best it can be, I recommend following this Printer Tuning Guide. Luckily I’ve already done most of that with my printer. You do need to change certain settings depending on the filament (like temp, cooling, and maybe flow rates)
Now that you’re done, you can check out my Upgrades. If you’re at the point of setting everything up, you can check out my Prusaslicer G-Code or the Prusaslicer Settings I use.